
Dishwasher Not Draining? Causes & Easy DIY Fixes | Edmonton, AB
If your dishwasher is not draining, it’s crucial to understand the potential causes and remedies. A dishwasher not draining can stem from several issues, and knowing how to identify them can save you time and effort.
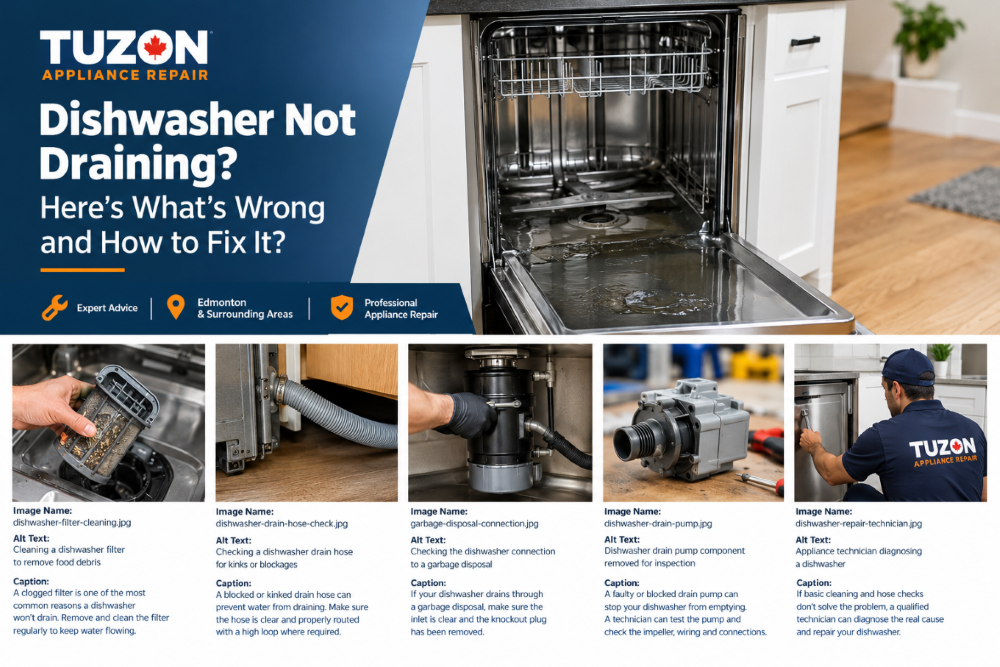
Dishwasher not draining water? Learn why standing water builds up, how to safely clean filters and hoses, and when to call an Edmonton appliance technician.
When your dishwasher is not draining properly, take immediate action to examine the factors involved. A dishwasher not draining is often a sign of more significant issues that require prompt attention.
Finding a pool of murky, soapy water sitting at the bottom of your dishwasher at the end of a cycle is frustrating. It ruins your routine, leaves your dishes smelling musty, and often makes homeowners worry that their appliance has completely broken down.
Here is the good news: a dishwasher not draining water does not automatically mean you need to purchase a brand-new appliance. In fact, many drainage problems are caused by simple, localized blockages in the filter, drain hose, or garbage disposal that you can fix yourself in just a few minutes.
When a dishwasher fails to empty, the culprit usually falls into one of two categories: a physical obstruction blocking the path of the water, or a mechanical or electrical failure preventing the pump from pushing the water out.
If your dishwasher is not draining, first check the filter and drain hose. A common issue is a blocked filter, which can easily be resolved. Remember, a dishwasher not draining could be a symptom of a larger problem that needs thorough investigation.
l Filter & Check Valve ]
                                  │
                                  ▼
                        [ Drain Pump & Impeller ]
                                  │
                                  ▼
                        [ Flexible Drain Hose ]
                                  │
                                  ▼
                      [ High Loop / Air Gap ]
                                  │
                                  ▼
            [ Garbage Disposal OR Sink Drain Tailpiece ]
A quick response is key. Leaving standing water inside the tub can lead to foul odours, bacteria growth, and unexpected leaks across your kitchen floor. This guide covers why your dishwasher won’t drain, how to safely diagnose the issue, step-by-step DIY fixes, and when it makes sense to schedule professional [Appliance Repair Edmonton] services.
Ultimately, if your dishwasher is not draining, taking the right steps can prevent future issues and prolong the life of your appliance. A dishwasher not draining is not just an inconvenience; it could indicate critical faults that need addressing.
Quick Summary: Why Your Dishwasher Has Standing Water
To ensure your dishwasher is working correctly, always be vigilant for signs that it is not draining. A dishwasher not draining could lead to more significant repair needs down the line if left unchecked.
Direct Answer: The most common reasons a dishwasher is not draining include a clogged dishwasher filter, food debris caught in the sump basin, a kinked or obstructed drain hose, a blocked garbage disposal knockout plug, a clogged sink air gap, or a failing drain pump assembly. Most clear-cut blockages can be safely resolved at home, while mechanical, wiring, or control board failures require a professional technician.
1. Why Is My Dishwasher Not Draining?
Your dishwasher relies on a simple fluid dynamic: the drain pump forces dirty water out through a fine filter, down a flexible drain hose, through a backflow-prevention device (like an air gap or high loop), and into your home’s household plumbing. A bottleneck at any point along this path will cause water to back up into the tub.
       TYPICAL DRAINAGE PATH & COMMON FAILURE POINTS

 [ Tub Basin ] ──> [ Filter / Sump ] ──> [ Drain Pump ] ──> [ Drain Hose ] ──> [ Disposal / Sink ]
                         │                    │                    │                   │
                     Food Debris         Stuck Impeller       Kinks/Grease       Knockout Plug
                     Paper Labels        Electrical Failure   Sagging Line       Plumbing Clog
Here is a breakdown of the primary causes behind a clogged dishwasher drain:
Clogged Dishwasher Filter: Paper labels, animal bones, dense grease, and large food particles collect in the fine mesh screen, blocking water from entering the drain sump.
Foreign Objects in the Sump Area: Broken glass, toothpicks, plastic wrap, or fruit seeds can slip past a loose filter and block the drain inlet.
Blocked or Kinked Drain Hose: A flexible plastic drain hose under the sink can easily kink, sag, or become choked with accumulated grease and calcium buildup.
Clogged Garbage Disposal Connection: If the dishwasher drains into a garbage disposal, food waste inside the disposal inlet can block the dishwasher’s discharge stream.
Blocked Air Gap: If your countertop features a chrome air-gap cylinder, accumulated debris can force drain water back down into the dishwasher tub.
Failed or Restricted Drain Pump: The electric motor that pumps water out may burn out, lose electrical power, or suffer from damaged internal windings.
Stuck or Damaged Drain Pump Impeller: Small foreign objects (like a piece of broken glass) can physically jam the plastic fins of the pump impeller, preventing it from spinning.
Blocked or Stuck Drain Check Valve: A small rubber flap or ball valve designed to stop dirty water from flowing back into the dishwasher can stick shut or get jammed open with debris.
Improperly Installed Drain Hose: If the hose lacks a proper “high loop” elevate under the counter, wastewater from your sink can siphon directly back into the dishwasher.
Electrical or Wiring Issue: Loose wiring harnesses, corroded terminals, or a blown triac on the main control board can prevent the pump from receiving electrical voltage.
Dishwasher Control Board Problem: Software glitches or hardware relay failures can cause the control board to skip the drain portion of the cycle entirely.
Excessive Suds or Incorrect Detergent: Using standard liquid hand dish soap creates massive suds that trap air pockets inside the pump impeller, causing the pump to cavitate and fail to move liquid.
Household Plumbing Restriction: A blockage downstream in your kitchen sink drain pipe will force wastewater backward through the path of least resistance—your dishwasher hose.
In summary, if your dishwasher is not draining, it can lead to serious sanitation problems and appliance damage. Understanding why your dishwasher is not draining will enable you to troubleshoot effectively.
2. First: Check How Much Water Is Left
Before pulling out tools, take a look at the exact water level in the bottom of the machine. Dishwasher designs vary considerably, and not every machine is engineered to be bone-dry at the end of a cycle.
               WATER LEVEL DIAGNOSTIC CHART

+-------------------------------+-------------------------------+
| Water Depth & Location        | Diagnostic Status             |
+-------------------------------+-------------------------------+
| Under 1 inch, contained       | NORMAL RESIDUAL WATER         |
| entirely inside the filter    | Keeps sump seals moist and    |
| sump basin below the filter.  | prevents pump seal damage.    |
+-------------------------------+-------------------------------+
| Over 1 inch, pooling across   | ABNORMAL STANDING WATER       |
| the flat floor of the stainless| Indicates an active drain     |
| steel or plastic tub.         | system blockage or failure.   |
+-------------------------------+-------------------------------+
Normal Residual Water
It is completely normal for 0.5 to 1 inch of clean water to remain trapped inside the lower drain sump below the removable filter screen. Manufacturers design this intentionally: keeping this small reservoir filled prevents internal rubber shaft seals on the pump from drying out, cracking, and leaking.
Abnormal Standing Water
If standing water covers the flat bottom of the interior tub, submerges the heating element, or threatens to spill over the front door threshold when opened, you have a genuine drainage problem that needs attention.
Identifying why your dishwasher is not draining is the first step towards a fix. A dishwasher not draining usually points to a specific problem that can often be resolved with simple maintenance.
3. Safety First
Remember, if your appliance is not functioning as it should, such as not draining, it’s essential to act swiftly. A dishwasher not draining should never be ignored, as it can lead to costly repairs.
Working on household appliances involves working around electricity, standing water, and sharp objects. Follow these basic safety precautions before inspecting or repairing your unit:
Disconnect Power: Unplug the appliance from the wall outlet beneath the sink or counter. If your dishwasher is hardwired directly into your home’s electrical system, switch off the dedicated circuit breaker in your main breaker panel.
Watch for Hidden Hazards: Standing dirty water often conceals broken glass, sharp ceramic shards, slivers of metal, or sharp bones. Never push your bare hands blindly into the drain sump basin; always wear cut-resistant gloves or use a small plastic scoop.
Shut Off Water Supply: If you plan to disconnect water lines or remove the drain hose, turn off the water shut-off valve located under the kitchen sink.
Avoid Live Electrical Diagnostic Tests: Never use a multimeter to test energized high-voltage electrical contacts unless you are a qualified technician. If basic cleaning does not fix the issue, leave live electrical diagnostics to a professional.
4. Step-by-Step: How to Fix a Dishwasher That Won't Drain
Follow this practical, step-by-step troubleshooting path. We begin with the easiest, non-invasive maintenance steps before moving on to component inspection.
                  TROUBLESHOOTING FLOWCHART

   [Step 1] Bail Out Standing Water & Clear Visible Debris
                             │
                             ▼
   [Step 2] Twist-Lock & Clean Primary Mesh Filter Screen
                             │
                             ▼
   [Step 3] Scoop Debris From Sump Basin & Check Check Valve
                             │
                             ▼
   [Step 4] Inspect Drain Hose for Kinks, Sags, or Blockages
                             │
                             ▼
   [Step 5] Clear Disposal Inlet / Verify Knockout Plug Removed
                             │
                             ▼
   [Step 6] Remove & Clean Countertop Air Gap Cap (If Present)
                             │
                             ▼
   [Step 7] Run Cancel/Drain Cycle & Listen to Pump Response
Step 1 — Remove Standing Water Safely
To work cleanly and safely, remove the standing water from the tub floor.
Bail out the bulk of the water using a plastic cup or small measuring pitcher into a bucket.
Soak up the remaining layer of water around the sump using large sponges or a wet/dry shop vacuum.
Lay down towels around the base of the cabinet to catch accidental drips.
Step 2 — Clean the Dishwasher Filter
A clogged filter is responsible for roughly half of all drainage service calls.
Remove the bottom dish rack to reveal the tub floor.
Locate the filter assembly in the center-back of the tub. Most modern units (including Bosch, Whirlpool, KitchenAid, and Samsung) feature a manual twist-lock filter.
Turn the cylindrical filter counterclockwise a quarter-turn and lift it straight up.
Separate the mesh cylinder from the flat fine filter plate if your model uses a multi-piece design.
Wash the filter under warm running water using a soft nylon dish brush and mild dish soap. Do not use stiff wire brushes or abrasive pads, as tearing the delicate plastic mesh will allow pump-damaging debris through later.
Step 3 — Inspect the Drain Area
With the filter assembly removed, look directly into the exposed drain sump basin.
Use a flashlight to inspect the pit below the filter.
Check for trapped twist-ties, paper bottle labels, broken dish fragments, or accumulated grease rings.
Reach into the basin using gloved fingers or needle-nose pliers to remove trapped objects.
Check the small drain inlet hole or check-valve flap located inside the side of the sump basin for flexible rubber blockage.
Step 4 — Check the Drain Hose
The drain hose is the long, corrugated plastic tube running from the dishwasher pump to your under-sink plumbing.
       CORRECT HIGH LOOP INSTALLATION UNDER KITCHEN SINK

       [ Countertop Structure ]
               /\  <-- High Loop fastened high against
              /  \     underside of counter (above sink rim)
  From       /    \
  Dishwasher /      \---> Connects to Disposal OR
   Hose ────/             Sink Tailpiece Drain
Open the cabinet under your kitchen sink and trace the corrugated hose back toward the dishwasher.
Check for sharp kinks, crushed sections, or heavy sags where grease and sediment collect.
Verify the High Loop: Ensure the drain hose loops up as high as possible under the countertop (fastened with a pipe strap or zip-tie above the sink’s flood level) before dropping down to connect to the drain pipe. Without this high loop, sink waste will flow backward straight into your dishwasher.
Disconnect the hose at the sink end and inspect the interior for solid grease plugs or food buildup. Clear obstructions using a flexible pipe-cleaning brush.
Step 5 — Check the Garbage Disposal Connection
If your dishwasher drain hose attaches directly to a kitchen garbage disposal unit:
Ensure the garbage disposal itself is completely clean and empty of food waste. Run the disposal with cold running water for 30 seconds to clear its interior grinding chamber.
Inspect the small nipple entry point where the dishwasher hose clamps onto the side of the disposal. Food particles frequently get jammed inside this metal or plastic nipple.
Clean out the nipple entry point using a screwdriver or small bottle brush.
Step 6 — Check the Air Gap
If your kitchen counter features an air gap (a small chrome cylinder mounted adjacent to your sink faucet):
Twist and lift off the decorative metal cover cap.
Unscrew or unclip the inner plastic cap.
Inspect for trapped coffee grounds, food pulp, or mineral scale inside the air gap chambers.
Clean out debris using tweezers, an old toothbrush, or a wet/dry vacuum held over the opening.
Step 7 — Run a Drain/Cancel Cycle
Once you have cleared the physical drain line:
Restore electrical power to the unit.
Start a standard wash cycle, allow the unit to fill with a few cups of water for 30 seconds, and then press and hold the Start/Cancel button for 3 seconds to force a manual drain sequence.
Listen closely to the sound made by the appliance:
A clear, steady hum accompanied by rushing water indicates successful drainage.
A low, muffled humming sound with zero water movement suggests a jammed pump impeller or restricted line.
Complete silence points toward an electrical connection issue, a blown fuse, a door latch switch failure, or a failed pump motor winding.
5. How to Tell if the Dishwasher Drain Pump Is Bad
The drain pump uses a small electric motor to drive a plastic impeller that forces water through the drain line. When this motor suffers mechanical wear or electrical winding failure, the system cannot generate sufficient head pressure to lift water out of the machine.
                 DRAIN PUMP FAILURE INDICATORS

+-------------------------------+-------------------------------+
| Symptom Observation           | Potential Root Cause          |
+-------------------------------+-------------------------------+
| Continuous hum with zero      | Impeller jammed by foreign    |
| water movement.               | object or stripped drive shaft.|
+-------------------------------+-------------------------------+
| Loud grinding, rattling, or   | Broken impeller blades or     |
| squealing noise.              | worn motor bearings.          |
+-------------------------------+-------------------------------+
| Pump runs intermittently or   | Thermal overload tripping due |
| stops mid-drain.              | to motor overheating.         |
+-------------------------------+-------------------------------+
| Complete silence when drain   | Open motor winding, failed    |
| cycle is activated.           | wiring harness, or bad board. |
+-------------------------------+-------------------------------+
Key Diagnostic Steps for Technicians
When an appliance technician evaluates a suspected drain pump failure, they will perform systematic checks rather than guessing:
Voltage Verification: Measuring electrical supply voltage at the pump harness connector using a multimeter during an active drain cycle to confirm the main control board is sending proper power.
Winding Resistance Checks: Checking the pump motor windings for electrical continuity and resistance using a multimeter set to Ohms ($\Omega$). Open circuits indicate a blown internal thermal fuse or burned motor coil. Resistance values vary by manufacturer and pump design; refer to your unit’s tech sheet for exact specs.
Impeller Inspection: Mechanically spinning the impeller manually to ensure it rotates freely and smoothly without binding against the motor housing.
Control Signal Evaluation: Testing control signals on modern variable-speed brushless DC (BLDC) drain pumps driven by microprocessors.
6. Dishwasher Drains Slowly but Doesn't Completely Stop
A dishwasher that drains partially or takes multiple cancel cycles to clear water presents a distinct set of diagnostic challenges compared to a completely dead drain system.
             PARTIAL VS. COMPLETE DRAINAGE CAUSES

  PARTIAL / SLOW DRAINAGE            COMPLETE DRAINAGE FAILURE
 ┌───────────────────────────┐      ┌───────────────────────────┐
 │ • Partially coated hose   │      │ • Jammed/seized impeller  │
 │ • Weak motor windings     │      │ • Burned-out pump motor   │
 │ • Partially clogged filter│      │ • Knockout plug left in   │
 │ • Partially stuck valve   │      │ • Completely kinked hose  │
 └───────────────────────────┘      └───────────────────────────┘
Common causes of slow drainage include:
Grease-Coated Drain Line: Fats and oils congeal along the inner walls of the corrugated hose, narrowing the internal pipe diameter over time.
Weakening Pump Motor: Motor windings degrading from age can cause the pump to lose torque as it warms up, causing water flow to slow down mid-cycle.
Partially Stuck Check Valve: A stiff or warped check valve flap that fails to open fully restricts maximum flow volume.
Restricted Plumbing Drain: A partial clog downstream in your home’s sink trap or drain line creates backpressure, slowing the dishwasher’s discharge rate.
Warning: Avoid repeatedly running wash cycles to force a slow-draining dishwasher to empty. Running a laboring pump repeatedly can overheat the motor coils, damaging the pump motor assembly or frying the control board relays.
If you encounter a situation where the dishwasher is not draining, take the time to investigate the potential causes. A dishwasher not draining can often be traced back to easily fixable issues.
7. Dishwasher Drains Into the Garbage Disposal but Still Has Water
If your dishwasher routes directly into a kitchen garbage disposal and fails to drain, the issue is almost always located at the disposal connection point.
       DISPOSAL CONNECTION POINT & COMMON BLOCKAGE AREA

        Dishwasher Drain Hose
                 │
                 ▼
      ┌─────────────────────┐
      │  Hose Clamp Collar  │
      └──────────┬──────────┘
                 │
                 ▼  <-- Food slurry, grease, and coffee grounds
     ┌───────────────────────┐   frequently collect right here
     │ Disposal Inlet Nipple │   inside the narrow plastic inlet.
     └──────────┬────────────┘
                │
                ▼
     [ Garbage Disposal Body ]
When you grind food waste in the disposal, heavy particles, fibrous vegetables, or grease slurries can slide sideways into the narrow dishwasher inlet nipple. As this sludge cools and dries, it hardens into a dense plug that blocks outgoing dishwasher water.
Clearing this is simple: loosen the screw clamp holding the rubber drain hose onto the disposal nipple, pull off the hose, and clear the nipple opening using a small screwdriver or stiff wire brush.
8. Dishwasher Has Standing Water After Installing a New Garbage Disposal
Did your dishwasher stop draining immediately after installing a brand-new garbage disposal unit? This is one of the most frequent plumbing issues home inspectors and appliance technicians run into.
        THE GARBAGE DISPOSAL KNOCKOUT PLUG ISSUE

  NEW DISPOSAL OUT OF THE BOX          KNOCKOUT PLUG REMOVED
   ┌───────────────────────┐          ┌───────────────────────┐
   │ Inlet Nipple CLOSED   │          │ Inlet Nipple OPEN     │
   │ ┌───────────────────┐ │          │ ┌───────────────────┐ │
   │ │  Plastic Factory  │ │  ───>    │ │ Clear Passageway  │ │
   │ │   Knockout Plug   │ │          │ │   Into Grinder    │ │
   │ └───────────────────┘ │          │ └───────────────────┘ │
   └───────────────────────┘          └───────────────────────┘
  (Water blocked completely)         (Water drains freely)
Every new garbage disposal leaves the factory with a solid plastic plug molded inside its side inlet nipple. This plug prevents sink water from leaking out if no dishwasher is connected.
If the installer forgets to knock out this internal plug before connecting the dishwasher drain hose, outgoing water has nowhere to go, leaving a tub full of standing water after the very first wash cycle.
How to Fix the Knockout Plug Issue:
Unplug the garbage disposal from its electrical outlet.
Disconnect the dishwasher hose clamp from the disposal nipple.
Place a flat-head screwdriver tip directly against the plastic disk inside the nipple.
Tap the end of the screwdriver handle firmly with a hammer until the plastic plug breaks free and pops into the main disposal chamber.
Reach inside the disposal grinding chamber through the sink opening and retrieve the loose plastic disk. Leaving it inside will shatter the disposal impellers when turned on!
Reattach the drain hose, tighten the clamp securely, and run a cancel/drain cycle.
9. Dishwasher Not Draining After Cleaning the Filter
If you thoroughly scrubbed the filter assembly, cleared the sump pit, and still find standing water inside the tub, the blockage is located deeper within the machine’s mechanical or electrical components.
              POST-FILTER TROUBLESHOOTING CHECKLIST

  [ Cleaned Filter ] ──> Still Not Draining? Check These:
                             │
                             ├─► Check Valve Flap Stuck Shut?
                             ├─► Drain Hose Kinked Under Cabinet?
                             ├─► Air Gap Cap Blocked with Scales?
                             ├─► Drain Pump Impeller Jammed/Broken?
                             └─► Pump Motor Receiving Voltage?
Potential remaining failure points include:
A Deeper Mechanical Blockage: Small fragments of glass or bone may have washed past the filter housing while it was removed, jamming the pump impeller downstream.
A Seized Check Valve: The non-return valve flap may be stuck closed due to hardened mineral deposits or greasy buildup.
Electrical Winding Failure: The pump motor coil may have suffered electrical breakdown coincidentally, preventing it from turning even with a clean filter.
Siphon Break/Air Gap Failure: A secondary blockage inside the high-loop connection under your sink counter may be preventing proper air relief.
10. Dishwasher Makes a Humming Noise but Doesn't Drain
A low buzzing or humming sound during the drain phase is a classic diagnostic clue: it proves that the main control board is successfully delivering electrical power to the drain pump, but the pump motor cannot physically rotate.
                  HUMMING PUMP DIAGNOSTIC FLOW

                  Drain Cycle Activated
                            │
                            ▼
               Humming Sound Heard From Base
                            │
            ┌───────────────┴───────────────┐
            ▼                               ▼
  [ Impeller Obstruction ]         [ Motor Seizure ]
  Foreign object (glass, bone,    Bearings rusted or motor
  plastic) physical jamming       windings shorted internally.
  the rotating fins.                        │
            │                               ▼
            ▼                    Requires Component
  Clear Object Manually          Replacement Service
Common Causes of a Humming Pump:
Foreign Object Obstruction: A tiny piece of glass, a hard fruit seed, or a stray twist-tie has slipped past the sump guard and wedged tightly between the plastic impeller blades and the outer motor housing.
Seized Motor Bearings: Water leaking through a worn shaft seal can rust the internal motor bearings, seizing the rotor shaft in place.
Deformed Impeller Assembly: Heat strain or age can warp plastic impeller blades, causing them to bind against the pump body.
Technician Tip: Do not allow a jammed pump to hum continuously for long periods. The stalled motor will draw high current, causing its thermal overload protection switch to trip or burning out the motor coils entirely.
11. Dishwasher Is Completely Silent During the Drain Cycle
When your dishwasher reaches the drain portion of its cycle and produces zero sound—no motor hum, no click, no mechanical relay engagement—the issue is typically electrical or sensor-related.
                SILENT DRAIN CYCLE CAUSES

 ┌─────────────────────────────────────────────────────────┐
 │ • Tripped Door Interlock Switch (Board senses door open)│
 │ • Blown Triac Relay on Main Control Board               │
 │ • Loose or Corroded Wire Harness Connector              │
 │ • Burned Open Internal Thermal Fuse on Pump Motor       │
 │ • Defective Water Level Sensor / Pressure Switch        │
 └─────────────────────────────────────────────────────────┘
Diagnostic possibilities include:
Faulty Door Latch Switch: If the main control board detects an open door circuit due to a failed door interlock switch, it will halt all motorized operations for safety.
Control Board Relay Failure: A damaged relay or blown triac on the main electronic control module fails to send voltage to the pump harness.
Open Thermal Fuse: An internal thermal fuse inside the pump motor windings may have blown due to prior overheating, creating an open electrical circuit.
Failed Pressure Switch / Float Switch: If the water level switch falsely reads that the tub is already empty, the control board will skip the drain pump activation sequence.
Correctly diagnosing a dishwasher not draining problem may require accessing internal wiring harnesses and taking electrical voltage and continuity readings with a multimeter. These electrical tests are best handled by a professional dishwasher repair technician to ensure the problem is diagnosed accurately and safely.
12. Dishwasher Not Draining and Showing an Error Code
For those who find their dishwasher is not draining, understanding the various components involved in drainage can be instrumental in resolving the issue quickly. A dishwasher not draining can often mean that your dishwashing routine is about to go awry.
Modern digital dishwashers use internal diagnostic routines to monitor sensor feedback and cycle times. If the control board detects that the water level fails to drop within a specified timeframe (typically 3 to 5 minutes), it halts the cycle and displays an error code on the digital console or blinks LED indicator lights.
             MAJOR BRAND DRAIN ERROR CODE EXAMPLES

  Whirlpool / KitchenAid / Maytag  ──>  F9E1 or 9-1 (Drain Failure)
  Bosch / Thermador                ──>  E24 or E25 (Drain Filter/Pump Blocked)
  Samsung                          ──>  5C, 5E, or OC (Drain Error)
  LG                               ──>  OE (Water Outlet Error)
  GE / Haier                       ──>  FTD (Fails to Drain)
  Frigidaire                       ──>  i20, i24, or EF (Drain Timed Out)
(Note: Error codes vary widely by generation and exact model number. Always consult the specific tech sheet tucked inside your unit’s lower access panel or your owner’s manual to confirm fault code definitions.)
13. When You Can Fix It Yourself
Homeowners can easily resolve many common dishwasher drainage issues without calling a repair service.
                     DIY VS. PROFESSIONAL REPAIRS

  DIY FRIENDLY TASKS               PROFESSIONAL REQUIRED
 ┌───────────────────────────┐    ┌───────────────────────────┐
 │ • Cleaning mesh filters   │    │ • Live voltage testing    │
 │ • Scooping sump debris    │    │ • Replacing drain pumps   │
 │ • Clearing air gap caps   │    │ • Control board diagnostics│
 │ • Straightening drain hose│    │ • Rewiring wire harnesses │
 │ • Clearing disposal inlet │    │ • Internal seal repairs   │
 └───────────────────────────┘    └───────────────────────────┘
You can safely handle these maintenance steps yourself:
Removing standing water with a cup or wet/dry vacuum.
Rinsing and scrubbing the removable mesh filter.
Clearing visible food debris and foreign objects from the sump basin.
Unscrewing and cleaning out a countertop air gap cylinder.
Inspecting the flexible under-sink drain hose for visual kinks or sags.
Cleaning food deposits out of the garbage disposal inlet nipple.
Knocking out the plastic inlet plug on a newly installed garbage disposal.
Don’t hesitate to contact us if your dishwasher is not draining. A dishwasher not draining can be a hassle, but we are here to help you get it back to working order as soon as possible.
14. When to Call a Professional Appliance Technician
If you have cleaned your filter, checked your drain hose, verified your disposal connection, and your dishwasher still has standing water, it is time to call a qualified appliance repair specialist.
       WHEN TO CALL FOR PROFESSIONAL APPLIANCE REPAIR

  [ Cleaned Filter ] ──> [ Checked Hose ] ──> [ Still Won't Drain? ]
                                                      │
                                                      ▼
                                       Call Professional Technician:
                                       • Voltage & Continuity Checks
                                       • Pump Motor Replacement
                                       • Control Board Diagnostics
                                       • Persistent Leak Repairs
Contact a professional technician when:
The dishwasher fails to drain after all basic visual and maintenance checks.
The drain pump makes loud grinding, rattling, or squealing noises.
The drain pump is completely silent and receives no power.
Component testing requires accessing high-voltage electrical connections or disassembling internal pump housings.
You suspect a blown main control board relay or a damaged wire harness.
The appliance displays persistent drainage error codes that recur after resetting.
Water is leaking onto your kitchen floor or inside the under-sink cabinetry.
Part-swapping without testing can quickly lead to wasted money. An experienced local technician can accurately isolate the true root cause whether it is a $20 check valve or a faulty control board relay saving you time and frustration.
15. How a Professional Technician Diagnoses a Dishwasher Drain Problem
When a technician from Tuzon Appliance Repair evaluates a dishwasher that won’t drain in your home, they follow a systematic, professional diagnostic workflow:
               PROFESSIONAL DIAGNOSTIC WORKFLOW

   1. Confirm Customer Complaint & Check Internal Error Logs
                             │
                             ▼
   2. Perform Visual Inspection (Filter, Sump, Hose, Air Gap)
                             │
                             ▼
   3. Force Manual Drain Cycle & Observe Electrical Response
                             │
                             ▼
   4. Access Lower Base & Test Pump Voltage with Multimeter
                             │
                             ▼
   5. Isolate Faulty Component (Pump, Check Valve, Board, Harness)
                             │
                             ▼
   6. Replace Component, Clear System, & Run Test Cycle
Complaint Verification & Error Code Retrieval: The technician enters the machine’s service diagnostic mode to view historic fault codes and system status logs.
Visual & Mechanical Inspection: They verify that filters, sump passageways, check valves, and under-sink drain connections are free of physical obstructions.
Manual Cycle Activation: The technician initiates a diagnostic service cycle to monitor the voltage output sent from the control board to the drain pump.
Electrical Multimeter Diagnostics: Using a digital multimeter, they test electrical supply voltage at the pump harness, measure motor winding resistance ($\Omega$), and check door interlock continuity.
Impeller & Volute Disassembly: If electrical supply is confirmed but the pump fails to move water, the technician removes the pump volute cover to inspect the internal impeller blades for hidden fractures or rotor shaft binding.
System Verification Test: Once the faulty component is replaced or cleared, the technician runs an automated test cycle to verify full drainage, check for watertight pipe seals, and confirm proper operational current draw.
16. Common Dishwasher Drainage Mistakes Homeowners Make
Avoid these common mistakes when troubleshooting a dishwasher drainage problem:
             COMMON HOMEOWNER TROUBLESHOOTING MISTAKES

 ┌─────────────────────────────────────────────────────────┐
 │ ❌ Ordering expensive replacement pumps without testing  │
 │ ❌ Forgetting the garbage disposal knockout plug        │
 │ ❌ Scrubbing delicate mesh filters with wire brushes    │
 │ ❌ Pouring harsh chemical drain openers into the tub    │
 │ ❌ Bypassing safety door switches during testing       │
 │ ❌ Overusing standard liquid dish soap in the washer   │
 └─────────────────────────────────────────────────────────┘
Replacing Parts Based on Guesswork: Buying a new drain pump online before verifying whether a $5 check valve is stuck or a hose is kinked leads to unnecessary expenses.
Pouring Harsh Chemical Drain Cleaners Into the Tub: Never pour caustic lye-based drain openers (like Drano or Liquid-Plumr) into your dishwasher. These harsh chemicals corrode internal rubber shaft seals, destroy plastic pump impellers, and void manufacturer warranties.
Damaging Delicate Filter Screens: Scrubbing fine nylon filter meshes with stiff wire brushes or metal scrapers tears holes in the screen, allowing foreign debris to destroy the pump impeller later.
Ignoring Under-Sink Drain Hose Routing: Installing a new drain hose without a proper “high loop” allows dirty, bacteria-laden sink water to backwash into your clean dishes.
Using Liquid Hand Dish Soap: Adding standard liquid soap creates dense suds that lock up the drain pump, causing water to overflow onto the kitchen floor.
17. Dishwasher Drainage Problems by Brand
While all dishwashers use similar physical principles to clear water, individual manufacturers use distinct design features, check valves, and filter configurations.
               BRAND-SPECIFIC DIAGNOSTIC CONSIDERATIONS

+-----------------------+-------------------------------+-----------------------------------+
| Manufacturer / Brand  | Common Drainage Issue         | Important Diagnostic Consideration|
+-----------------------+-------------------------------+-----------------------------------+
| Whirlpool, KitchenAid,| Food soil chopper blade       | Check lower sump chopper area for |
| Maytag                | jams; rubber check valve      | foreign objects; inspect duckbill |
|                       | swells or sticks shut.        | check valve flap.                 |
+-----------------------+-------------------------------+-----------------------------------+
| Bosch, Thermador      | Extremely fine micro-filters; | Requires regular filter cleaning; |
|                       | clear plastic pump cover      | check pump cover latch engagement |
|                       | unclips or jams easily.       | closely (E24/E25 errors).         |
+-----------------------+-------------------------------+-----------------------------------+
| Samsung               | Sensitive optical water level | Inspect sump sensor window for    |
|                       | sensors; check valve flap     | grease coating; check drain hose  |
|                       | stiffness.                    | for sharp bends behind machine.   |
+-----------------------+-------------------------------+-----------------------------------+
| LG                    | Drain hose check valve        | Check OE error code; verify drain |
|                       | blockage; BLDC variable-      | pump motor harness connector for  |
|                       | speed pump harness issues.    | tight pin fitment.                |
+-----------------------+-------------------------------+-----------------------------------+
| GE, Hotpoint,         | Solenoid-actuated dual-drain  | Test drain solenoid operation on  |
| Haier                 | valves on older models;       | older units; check fine filter   |
|                       | fine filter clogging.         | basket retention ring.            |
+-----------------------+-------------------------------+-----------------------------------+
| Frigidaire,           | Sump ball-check restrictions; | Verify ball check moves freely inside|
| Electrolux            | drain hose sags behind tub.   | sump housing; inspect hose loop.  |
+-----------------------+-------------------------------+-----------------------------------+
| Miele                 | Dual non-return valve balls;  | Ensure non-return valve metal locking|
|                       | strict pressure monitoring.   | clamp is completely snapped shut.|
+-----------------------+-------------------------------+-----------------------------------+
Frequently Asked Questions
Why is my dishwasher not draining?
When a dishwasher not draining, it may be due to a variety of reasons. A dishwasher not draining can often be traced back to something as simple as a blocked filter.
The most common causes are a clogged mesh filter, food debris blocking the sump pit, a kinked or crushed drain hose under the sink, a blocked garbage disposal connection, a jammed countertop air gap, or a failed drain pump motor.
Why is there standing water in the bottom of my dishwasher?
Standing water pooled across the interior floor of the tub indicates that dirty water was unable to exit during the final drain phase. This is caused by a physical restriction in the filter or drain line, or a mechanical/electrical failure of the drain pump assembly.
Is a little water in the bottom of the dishwasher normal?
Understanding why your dishwasher is not draining can help prevent further issues. A dishwasher not draining can often be fixed with some basic cleaning and maintenance.
Knowing how to handle a dishwasher not draining is crucial for every homeowner. A dishwasher not draining can disrupt your daily routine, making prompt action necessary.
Yes. Having 0.5 to 1 inch of clean water sitting inside the lower sump basin below the filter screen is standard across most dishwasher designs. This reservoir keeps internal rubber pump seals moist so they do not dry out, crack, or leak.
How do I unclog a dishwasher drain?
Start by scooping out standing water, removing the lower dish rack, unscrewing the central filter assembly, and washing it under warm water. Clear any visible debris from the sump pit, inspect the under-sink drain hose for kinks, and ensure your garbage disposal connection is clear.
How do I clean a dishwasher filter?
Before you take any drastic action, check if your dishwasher is not draining due to something as simple as a clogged filter. A dishwasher not draining can often be the result of minor oversights.
Twist the lower cylindrical filter assembly counterclockwise a quarter-turn, lift it straight out, and separate the mesh components. Scrub the screen gently under warm running water using a soft nylon brush and dish soap, then reinstall it securely.
A common question is how to address a dishwasher not draining effectively. A dishwasher not draining can often indicate a simple blockage that requires immediate resolve.
Why is my dishwasher humming but not draining?
A humming sound means the drain pump motor is receiving electrical power from the control board, but its plastic impeller is physically blocked by a foreign object (like broken glass or a bone) or the motor bearings have seized.
Local Appliance Repair Service in Edmonton & Surrounding Areas
If you live in Edmonton, Alberta, or nearby communities, dealing with a dishwasher that won’t drain can throw off your entire household schedule. While simple filter cleanings and hose checks are easy DIY fixes, complex electrical diagnostics, pump replacements, and control board troubleshooting require specialized technical tools and expertise.
              TUZON APPLIANCE REPAIR - SERVICE AREA

  ┌─────────────────────────────────────────────────────────┐
  │ • Edmonton, AB           • Spruce Grove, AB             │
  │ • St. Albert, AB         • Leduc, AB                    │
  │ • Sherwood Park, AB      • Fort Saskatchewan, AB        │
  │ • Beaumont, AB           • Devon, AB                    │
  └─────────────────────────────────────────────────────────┘
Rather than guessing which components to order or risking accidental water leaks under your kitchen cabinets, let a qualified local technician diagnose the root cause accurately.
Tuzon Appliance Repair provides professional, transparent, and experienced appliance repair services throughout Edmonton and surrounding communities. Our goal is always to deliver an accurate diagnosis and perform precise repairs that restore your home’s appliances efficiently.
Need Help With a Dishwasher That Won't Drain?
If your dishwasher not draining after ensuring everything is clear, it may be time to consult a professional. A dishwasher not draining should be treated seriously to avoid further complications.
Still dealing with standing water in your dishwasher after cleaning the filter and checking your hose? Tuzon Appliance Repair can help. Our qualified technicians service all major dishwasher brands across Edmonton and surrounding areas, accurately identifying whether your drainage problem is caused by a simple obstruction, a check valve issue, or a failed drain pump.